Breeding chicks
Community

Firstly let me dispel one myth about keeping chickens: you do not need a cockerel to have chickens lay eggs. Hens will lay eggs regardless of whether there is a cockerel to copulate with or not. However if you wish to breed chickens you will need a cockerel and of course he will have to be a fertile cockerel. And the fact that he can be seen copulating every hen in his sight is no indication of fertility.
The cockerel
The best way to successfully determine fertility for the small holder is to buy good quality stock. Once you have decided on the particular breed or breeds you intend to keep, then search for a reliable source of quality stock. This is best done by recommendation from other smallholders and stock keepers. If you are new to keeping poultry ask a neighbour or friend with experience of chickens, to go with you when you buy your stock.
Look for good healthy examples of your chosen breed – good bright plumage, good bright coloured comb and wattles, and bright eyes are all indicators of health. Your cockerel should have a full and well developed comb; if it look stunted or misshapen them don’t buy the bird. But! You will need to check on your chosen breed’s normal comb shape as some are very different from the normal spiked comb seen on a particular cereal package.
The hens
If you can buy unrelated hens from the same supplier as your cockerel then all to the good but if not then you need to search for another good supplier. Most breeders will have their own unrelated stock and will put together a breeding pair or even a trio and sell them as such. This is a preferable way to get your breeding stock but if you intend to keep some of your own stock and breed from them you will need to buy at least two unrelated pairs or trios so you can keep your stock from in-breeding.
I would not advocate keeping just one pair of chickens; even a trio is not ideal. Cockerels tend to spend their day looking to copulate any hens in sight; if his choice is too limited he will just keep copulating with the same hen over and over again. This will result in your hen looking somewhat dishevelled at best.
NATURE’S WAY
My preference for any kind of animal activity, is for nature to be allowed to take its course. I feel the same way when it comes to breeding chickens; cockerels and hens will reproduce quite naturally if left to their own devices. However, if you have chosen hybrid or crossed stock this may not be the case.
Once your traditional breed hens come in to lay (start to lay eggs) they will want to reproduce – its just the way they are made. At first they may lay in the boxes you have provided but if you collect their eggs, they may look for new places to lay, which you do not know about. They will try to accumulate a small clutch of eggs – 12 is not uncommon and 20 plus eggs is sometimes possible; but 10 to 12 is a good number as a hen will be able to cover and keep them all warm enough to hatch.
I had a hen simply walk out of the hedge one day with a small group of chicks under her wings, with no prior knowledge of her even being broody (desiring to reproduce.) This same hen gave us two further broods of chicks within a year, earning her the title of “super mum”.
Broodiness
When your hens are ready to sit they will usually not leave their nest willingly, even becoming quite aggressive if you try to move them to collect their eggs. I would usually leave a hen exhibiting these signs to do her thing naturally; I may even add a couple more fresh eggs back under her to make up the clutch to 12. Then make a note of the date and wait 21 days, making sure she has access to food and water nearby her chosen spot if it’s not in the hen house.
Hens know what to do so leave her to do what is necessary; she will turn her eggs several times a day. Hens still need to feed and drink so she will leave the nest at times during the day to do just that, returning in her own time to re-cover the eggs and keep them at the right temperature and humidity. After 21 days she will have hatched all of the fertilised eggs. I have had a hen lay 12 eggs, sit on them and have all of them hatch and survive without any intervention at all. Hens know how to look after their own chicks, and there is no more satisfying sight than watching a hen teaching her chicks to feed, drink, and clean themselves.
ARTIFICIAL INCUBATION
AI can be complicated – if you get it wrong you risk killing perfectly viable chicks. I have done artificial insemination successfully but it has its pitfalls so be prepared to spend some money and fail anyway.
There are of course many reasons to artificially incubate eggs; it offers some certainty of timing, if you need to meet with market demand for hens or for increases in your own stock. With experience you can calculate the number of eggs you can hatch in any given period with a predetermined budget. If you have a limited stock of a particularly precious breed then you can guarantee a return on your investment, but you will of course have to invest further for the equipment to do so.
The latter is my reason to artificially incubate as I have a precious breed of chicken and only one unrelated pair of them so artificial incubation helps me increase my stock, pay back my investment in a relatively short period of time, and give me enough profit to buy some more unrelated stock.
Storage and handling of eggs
You will need to collect eggs in order to incubate them. Handle all your hatching eggs carefully, store them somewhere cool but not cold – a domestic fridge is too cold but a cellar or north facing room is ideal.
Store your hatching eggs point end down if using egg boxes or leave them on their side in baskets; be very careful to avoid storing point end up. Store them for at least one day; never put them in an incubator the day they have been laid but avoid storing them for more than 10 days. About 5 to 6 days is optimum. Turn your eggs once for one half turn if you are going to keep them for more than 5 days.
Incubators
Your incubator is an investment, and with all investment you should invest wisely. Artificial incubation is a recent departure for us at Le Bois de Grammont, and it’s one that we took very seriously.
You can buy an incubator for as little as 59€ or you can spend as much 1200€ and more. We opted for a good quality forced air incubator which cost 159€.
Still-air incubators: a still air incubator is one that heats up using lamps or heating elements and does nothing to even the temperature out within the incubator housing. This type of incubators can lead to a greater number of failures in attempts to artificially incubate eggs.
Forced air incubators: a forced air incubator is one that utilises a fan as well as a lamp or heating element to ensure an even temperature throughout the incubator housing. This type of incubator usually results in a greater number of successful artificial incubations.
Manual or automatic
Manual incubators need twice-daily human intervention – the eggs need to be turned at least twice a day and you will have to turn each egg by hand.
With a semi automatic incubator you will have to operate the turning mechanism at least twice a day by hand
A fully automatic incubator will automatically turn the eggs twice a day
Most incubators have a thermostat to regulate the temperature of the incubator; others have a hygrometer and automatically regulate the relative humidity.
Unsurprisingly, the more features your incubator has the more it will cost. The cost is relative to the success of your efforts to artificially incubate eggs, so choose your budget and select the best incubator you can buy.
The technical stuff
Hens manage all of this by nature so it can’t be too hard can it? Well…
Eggs need to be turn at least twice a day for the first 18 days of incubation or you will hatch deformed chicks or no chicks at all. For the last 3 days they can be left unturned.
Eggs need a constant temperature of 37.2°C for 21 days. Some fluctuation can be tolerated by the embryo but it is not advised to let it drop too often or for too long as embryos are not tolerant of high temperature fluctuations above the optimum.
Eggs need a relative humidity of 50% to 60% for the first 18 days and approximately 70% to 75% for the last 3 days
Incubating eggs
Now you have stored your eggs round end up in a cool place for six days and collected enough to fill your incubator. Your incubator should be tested with no eggs in it to make sure you can maintain the correct temperature and humidity for 24 hours without adjustment.
When you are satisfied that you can maintain the correct temperature and humidity, you can begin. First, warm your eggs gently before placing them in the incubator. If you have purchased a manual incubator mark all of your eggs on two sides with a pencil. A cross on one side and a circle on the other will suffice; this is so you know you have turned all of your eggs half a turn. Fill the water receptacle provided and close your incubator.
You will now have a daily routine to follow for the next 18 days. At all times, check that the water receptacle provided is full. Turn your eggs at least twice a day, preferably more; an odd number is best to avoid the chick lying on the same side for the longer night-time period.
After 18 days you can stop turning the eggs but check the water level as often as necessary and raise the relative humidity to around 70%. This is usually accomplished by closing some of the incubators ventilation holes.
After 20 days you will start to hear the eggs piping and some time in the next 10 to 48 hours you will have chicks hatching – or not.
I have to say maintaining the correct temperature with our incubator was easy. After setting it up as directed by the manufacturers instructions and some fine adjustment, it just stayed right. The relative humidity however was a different story it stayed higher than the optimal throughout the incubation period at about 70%. And we obtained 70% hatching of 100% fertile eggs. We know these figures because we candled (see below) our eggs at 7 days and found them all to be fertile but only 70% actually hatched.
Candling

candling box
This procedure to test the fertility of an egg is called candling because originally it was done with a candle. Today is can be done with a flashlight, and a home-made candling box. You don’t need to buy an expensive, specially designed candling torch.
After 7 days of incubation you can candle your eggs in a darkened room, illuminating the pointed end of your eggs.

A fertile egg
What you are looking for is fertility. If your eggs are fertile then you should see a small dark spot with tentacles going out from it in all directions.
Replace all of your fertile eggs as soon as you can, keeping all of the infertile eggs back for consumption either by yourselves or the pigs if you have any.
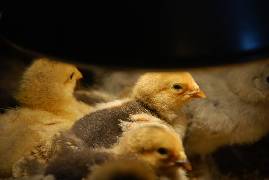
Introduction to artificial brooding of chicks
A chick hatched by artificial incubation cannot maintain a proper body temperature without your help. Exposing a chick to cool temperatures in the first three weeks of life makes the bird uncomfortable and less likely to eat the feed and drink the water needed for a good start.
In meat-type chickens, cool temperatures can lead to permanent heart damage. Exposing the young bird to cool (20°C or less) for the first day or two can cause the bird to die from heart problems later. Heated accommodation is definitely needed for brooding.
The body temperature of a day-old chick is approximately 39°C, but by about five days of age body temperature is 41.1°C, the same as the adult.
Extreme temperatures (high or low) often result in chick mortality, but even mild chilling or overheating can damage young chicks without causing death.
While chicks are more tolerant of high temperatures than adult birds, high temperatures for extended periods of time increase mortality.
For a small flock, the most common source of heat is a heat lamp. These lamps accommodate a 100 to 250-watt red or clear infrared bulb. When suspended 45cm to 60cm off the floor, they provide enough heat to brood up to 100 chicks; some units have thermostatic controls, while others have to be raised or lowered to provide the required temperature at bird level.
As the birds grow older, lower the temperature by raising the heat lamp or reducing the wattage of the bulbs. As a smallholder my eye is always on cost so the higher cost of thermostatic control is out of my reach.
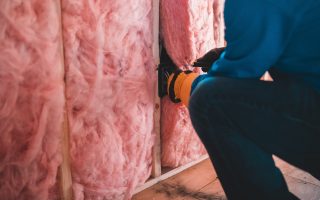
Turn the heat on at least one day before the birds arrive; make sure the temperature is constant. The temperature 1 cm (½ “) below the litter surface should be at least 26°C for even if the air is the correct temperature, the cold floor can chill birds. I achieve a warm temperature by brooding in a plastic box placed on an old camping mat for insulation.
The temperature on the top of the floor, at the edge of the heat source, should be 32°C to 35°C for the first week. As long as the temperature at the edge of the heat lamp is this warm, the air temperature away from the heat source can be as low as 28°C. The birds can then choose where they feel most comfortable. The temperature should be reduced by 3°C per week, until the room temperature of 20°C is reached. After six weeks of age, temperatures in the 18 to 21°C range are desirable.
One other point of importance: my plastic box has a smooth floor and at first it caused some splaying of the chicks’ legs, which resulted in deformity in our first batch of chicks. I then read in at article on the web that smooth surfaces should be avoided. We have use a piece of our camping mat placed inside the brooding box. We first tried a layer of sawdust but this didn’t work either.
Judging bird comfort
The behaviour and sounds of the chicks will indicate their comfort level. Comfortable birds will form a circle under the lamp, and make soft “cheeping” noises. Cold birds will huddle and pile, and make sharp noises. If birds are too hot, they will huddle as far from the lamps as possible. Some birds will pant if the temperature is too high. Your birds will do a better job than a thermometer of telling you if they are comfortable.
Ventilation
Ventilation is needed to regulate temperature and remove carbon dioxide, ammonia, other gases, moisture, dust and odours. You can of course use a fan but this must work uniformly or you will simply reduce the temperature. My box is in a ventilated room and the top of the box is a wire mesh to protect the chicks from predators including our cats, and allows for free exchange of air. Heat, of course, rises so as the warm air leaves the box through the top, fresh air is pulled in. This works adequately for small numbers of chicks.
Lighting during brooding
Light is an important factor during brooding – do not ignore it. Chick activity is greater in bright light intensity than low light intensity. During brooding the light should be at the brightest intensity to encourage chick activity thus assisting them to locate feed and water.
Finally… providing a comfortable and healthy environment during brooding is crucial to getting the chicks off to a good start. Chicks that are reared under conditions that result in stress may not thrive.
Steve Hanson
Share to: Facebook Twitter LinkedIn Email
More in activity, camping, courses, food, health, holiday accommodation, work
Related Articles


By FrenchEntrée
Leave a reply
Your email address will not be published. Required fields are marked *
REPLY