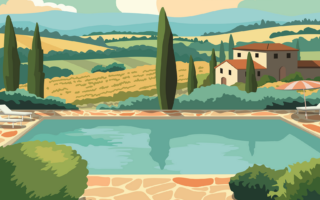
How to DIY a Swimming Pool


Hoping to save money by installing your own pool? I’t possible, but there are a few things to consider…
Before doing any type of installation it’s going save you a lot of time and hassle if you do as much preparation as possible.
Decide where you want to have your new pool, ideally put it somewhere it’s going to have the sun on it all day, especially if you are considering heating it with a solar system. Consider things like access for a digger or lorries delivering materials, (the easier you make it, the cheaper it’s likely to be).
Decide if you want to remove the spoil that comes from the hole or use it to landscape the surrounding garden. It’s worth remembering that there is a huge amount of spoil from the average excavation so often it’s better to just get shot of it, especially if you have stony ground.
Pay special attention to any water lines, drains, fosse septiques, cables or anything else that could be underground where you want to fit the pool, it’s only funny for about 30 seconds when your mate hacks through a water main and gets several gallons of water in the face, it’s not at all amusing when an electrical cable is struck, least of all if it’s after the water main!
Make sure you leave yourself enough room around your proposed pool area to install whatever type of terracing you decide to have, if you’re going to fit a security fence in France make sure you have room to leave the minimum of 1 mtr all the way around the pool.
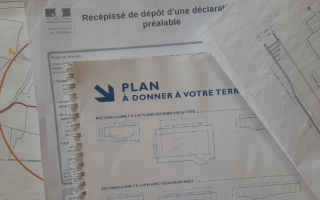
One other important thing to make sure of before you start is that you have the relevant planning permission to install your pool. In France check with your local Marie first then fill out a “declaration de travaux” if you don’t hear anything from the D.D.E. within 45 days of them receiving your declaration and your Marie say’s it’s o.k. you can fit your pool. DON’T FORGET, all new pools in France must be fitted with an AFNOR approved security system as from 01/Jan/2005.
Stage 1. Make sure you buy a good quality D.I.Y. pool kit
There’s hundreds of different D.I.Y. pool kits available so try to find one which comes with a set of good installation instructions and someone you can contact if you have any problems. Make sure any accessories that come with it are from a reputable manufacturer so if it goes wrong you can get any spare parts or technical advice.
TIP: When your pool arrives check the contents of the kit to make sure it’s all there before you start.
Stage 2. Mark out the hole
Most kit pools only need a maximum of 50cm (500mm) room all the way around them to be able to build them, so if your pool is going to be 4 x 8 mtrs your hole will be marked at 4.5 x 8.5 mtrs. Easy so far, right? Also make sure you mark two centre lines, one down the length and one across the width. These two lines should be staked at either end well out side the area of the hole. If you keep these markers you can always check your measurements if you need to.
Mark the hole with a fluorescent spray paint so the digger driver can clearly see where he is digging, if you are going to fit roman end or walk in steps these are best dug out by hand, however if you can mark the location of the steps a 45 degree slice of soil taken from the back of the step to around 400 mm above the base of the pool will save you a lot of digging and get rid of some more spoil for you.
TIP. By keeping the hole as small as possible it will mean you have less to backfill and therefore use less material.
Stage 3. Dig the hole
If you hire a good digger driver he will usually have his own laser level, if not, hire one. For the best results check the depth of the hole regularly and also make sure that the sides of the hole are vertical, if not, once the digger leaves you will have to shave the sides of the hole by hand, not fun. You may have to allow extra depth for under-pool drainage but remember to measure leaving at least 100mm sticking out of the ground so you have enough depth to lay any terracing.
Stage 4. Building the pool structure
When you get to the stage of putting your pool kit together, pay real attention to all levels and measurements. MEASURE TWICE, DO ONCE, check all dimensions are what they are supposed to be, horizontally, vertically and diagonally. If something doesn’t look right, it probably isn’t. This bit may take anything from a day to three or four depending on the type of kit used and how much concrete is needed to support the structure.
Stage 5. Preparing the base
Most D.I.Y. pool kits have liners, most of which be installed on a base of compact sand or, a weak sand and cement screed. A cement base can be smoother than sand and makes for a more professional finish so ask your supplier to see what they recommend.
For a sand base, wet the sand and use a 45kg compactor or hand garden type roller to flatten the base. If concrete is preferred use a semi dry mix, reinforced with metal or fibre, draw a screed rail over the surface to make around a 6cm thickness then smooth off with a “taloche” or board type float.
Stage 6. Preparing the pool interior
Some liners need around a 4-5” fillet all the way around the base of the pool between the walls and the floor at 45 degrees so that they are less stressed at the seams. Check the walls of your pool for any sharp edges and either cover them with duct tape or silicone sealant. Sweep, or better still vacuum, the base of the pool if it’s a cement base, any holes or digs in the base can be covered with a thin layer of just dry cement powder smoothed out.
Extra protection for the liner can be provided by a felt or foam under lining placed on the floor and walls, this also makes it very pleasant under foot.
Stage 7. Fitting White Goods
It’s normally at this stage that the skimmers, jets, lights, plumbing and any other fittings needed, are cut and fitted into the structure of your pool. Skimmers are usually placed at the opposite side to the inlet jets, take care to measure their positions accurately. Pay attention to all seals and use a suitable sealing compound if required.
TIP: Don’t fit an underwater projector facing a house as they can be far too bright at night.
Stage 8. Installing the liner
Ensure all fittings are well sealed and check one last time for any sharp edges. Feel all over the floor and if a stone or clump of sand can be felt a quick thump from a hammer will get rid of them. You’ll be surprised how large the smallest grains can feel when they are under a piece of felt. Try to fit your liner when it’s a hot day, unfold the liner and it will become supple enough to get any creases or folds out.
Secure the liner at the top of the pool and place the tube of a vacuum cleaner between the liner and pool wall in a central position. Seal off all other gaps and as you begin to add water, smooth out the wrinkles in the base of the pool with your feet. At the same time switch on the vacuum and the liner will sit back against the walls of the pool getting rid of wrinkles and creases.
TIP: Cut your toenails before you start, long nails can puncture a liner easily when it’s being installed.
Stage 9. Cutting the liner
If you have to cut the liner in a pool for the skimmers, jets, roman end or whatever, always fill the pool to just below the level of the fitting before cutting it out, this way the liner will already be stretched into position and will not tear. Pay special attention and make absolutely certain of where you need to cut the liner. A hole in the wrong place at this stage would not be ideal.
You can normally clamp the liner into place around whatever you are fitting, then cut out the liner, don’t try to cut (by eye) before the liner is in place, no-ones free hand is that good!
Stage 10. Finishing off
Backfilling any pool is one of the most laborious jobs to do, especially if you don’t have a digger at hand. Continue to fill the pool and backfill at the same time. Some pools will need a backfill of dry sand and cement, others use stone for better drainage or just the spoil from the hole, consult your kit supplier.
Connect your pump and filtration system and fit any marjelles (coping) if required. Any stone marjelles (coping) should be fitted using white cement mixed with a water proofing compound such as hydro-fuge.
That’s it. Your pool is now ready for use, once you have added either salt or chlorine to treat the water. Even if you still have to build a terrace you can taste the fruits of your labour. Go on dive in!
Share to: Facebook Twitter LinkedIn Email
More in centre, garden, heating, renovation, swimming pools, walking
Related Articles

By FrenchEntrée
Leave a reply
Your email address will not be published. Required fields are marked *