Diary of a Corrèze Conversion – Part 2

Setting up a cycling business in Limousin from scratch
We had moved to France to set up our new venture running specialist cycling holidays in the Limousin, and had in front of us a ‘grand design’ style project converting a barn and building a new extension to house our future clients. Having found a great architect we began the process of developing plans and applying for planning permission.
One major issue was establishing how deep we could safely excavate inside the barn in order to finalise finished floor levels. This involved James digging out the lower floor of the barn for two weeks, heroically moving a couple of tonnes of rocks and sand by hand. A few months later, watching our neighbour Jean Louis excavating the foundations for the extension with a ‘mini pel’ digger we realised that he could move the same amount of material in under an hour…
With our architect Jean David Diemoz apprised of the final depth possible for foundations in the barn, the final plans were prepared and submitted for planning permission. We had decided to employ David to undertake the planning application ‘Permesse de Constuire’ on our behalf. This added around 800 euros to his fees, however as our plans involved a substantial new build extension of 90 square metres we felt that this was a safer option for a successful application as he fully understood all the ins and outs of French planning legislation. David completed all the paperwork and prepared all the necessary plans, including copies of our cadastral plans showing the official boundaries of our property, and photos of the property taken from the road in all directions. I then took the plans – four copies as with everything in France – to our Mairie.
The secretary registered the plans and then gave me a certificate confirming the date that the plans were deposited. The fact that we had used an architect was noted with the comment ‘oh then these will have no problems then’ which was heartening.. We would then have to wait for 8 weeks for the application to be granted which would arrive in the form of a letter saying ‘arête’ not to be confused with arrete which means stop!
In the meantime we had already embarked on the conversion of the loft in the main house to create a new master suite. The estate agents details had described the loft as comprising ‘two charming bedrooms’. This we had found to be as wildly inaccurate as UK estate agents information – the two charming bedrooms were in fact a windowless storage area leading to a separate filthy room that seemed to be a fly graveyard. Both areas were completely covered in knotty tongue and groove cladding.

In order to begin work on the loft we had to complete a simpler form of planning application the ‘declaration prealable’. Essentially in France one has to fill in a declaration for any work undertaken on your house, even painting an exterior wall needs permission. The forms are always registered at the Mairie for these smaller works, however it is not the Maire who makes the decision on what will go ahead – all declarations are forwarded on to the local planning department.
You then have to wait for 8 weeks from the registration date of any declaration. If you have not heard anything from the planners after 8 weeks you are fine to go ahead.
The declaration prealable was relatively simple to complete once one realises that most of the form relates to different types of projects, so not all sections are relevant. The most important sections are a written description of the works and a table showing the existing area of the house (SHON) and the increased surface area (if any) on completion of the works – this is used to recalculate the Tax d’habitation (council tax). In our case our surface area actually decreased, as bathrooms and corridors do not count on the calculation of living space and the two bedrooms would become one bedroom and a large ensuite bathroom.
Once I had swamped the Mairie with lots of proper paperwork and it was seen that we were trying to do everything properly, I found that we were able to shortcut the process. We had also submitted an application for double glazing for all the windows in the house and I visited the Mairie and asked permission to go ahead 4 weeks early as, with no central heating, we were freezing. This was given the thumbs up and we got on with the work.
The price of wood double glazed windows had been a surprise. With many things for example paint, costing much more in France, we had found that wooden double glazed windows were around 30-40% cheaper. The wide range of standard sizes enabled us to find something that would fit all of our windows give or take 5cms that could be filled in with wood packers. The actual fitting was very simple, once the old windows were taken out and the stonework scraped clean, the new windows slotted into the reveal and were held in place with expanding insulating foam. Once the foam was completely dry it was trimmed back to a neat finish and covered with mortar.

The first part of the work for the loft conversion was stripping out the old tongue and groove panelling and the filthy insulation, which had disintegrated over the years to a form of packed dust. James in a body suit with hood and mask resembled a CSI investigator as he dumped the contents of the roof out of the only window. Once stripped back fabulous oak A frames and beams were revealed. We then sanded back all the woodwork and treated with the woodworm treatment Xylophene.
Having been warned by friends with first hand experience, we paid special attention to finding out if there were any Capricorn beetles in the timbers. These large pests make woodworm look like amateurs when it comes to tunnelling through wood and need special treatment. Our friends could actually hear them chewing through their beams! Luckily we didn’t find any trace of them.
Our contractors Remy and Tim then arrived and made short work of installing four new Velux windows, installing new partition walls, plumbing, insulating and putting up plasterboard panels (placot) using a metal frame system that is popular in France. In order to maximise space in the new bathroom, Tim turned the top of the staircase to create a corridor on the narrower side of the attic. We used 200mm of rock wool or laine de verre for a good level of insulation. With hindsight it would also have been good to add a reflective layer as well to deflect the heat in the summer as the laine de verre on its own was not sufficient to insulate against the heat in summer and the room still tends to get quite warm.


Taping the joints in between the plasterboard and filling gaps between placot and old beams with plaster took the longest time, but James took this on and after a month I was able to start tiling & painting to complete our target to complete the room in time for my mothers Easter visit. The aim was to get as much finished as possible before the planning permission came through for the main part of the build. This we largely managed although the oak skirtings and built in cupboards have yet to be fitted and will now have to wait for a year or so.
We used imported Farrow and Ball paint – every visitor was asked to squeeze in a few cans if they were coming by car – ‘Pointing’ on the ceiling which is a perfect warm off white, and ‘String’ on the walls for mellow warmth. Behind the bed on the partition wall that hides the walk in wardrobe we used a Clarissa Hulse wallpaper.
We were lucky to have existing oak parquet on the floors, and we had planned to machine sand the floor when we were finished and so had not protected it from falling wet plaster and paint splashes. In the end James felt that it would be just as easy for me to scrub it by hand, which I did for 4 days solid muttering every curse and insult I could think of. Any imperfections were covered by furniture and a collection of cowskins which feel lovely underfoot.


We furnished the room using our existing furniture, with the addition of a pretty Louis style sofa bought very reasonably from Maison du Monde. Having worked as a professional interior designer for the last 10 years, I paid special attention to the lighting which can make or break a scheme. James inserted oak sections in between the gaps in the beams and I had the electrician install small low energy tubes in the trough this created. At night this gives a gentle uplighting effect across the ceiling and beams and complements the lamps. On a weekend trip to Carcassone we had splashed out on a vintage chandelier to hang above the sitting area which gives a luxurious feel and casts huge chandelier shaped shadows across the wall. Our retreat completed we could then get on to the main build.

To be continued……………
You can read part 1 of sam’s story here
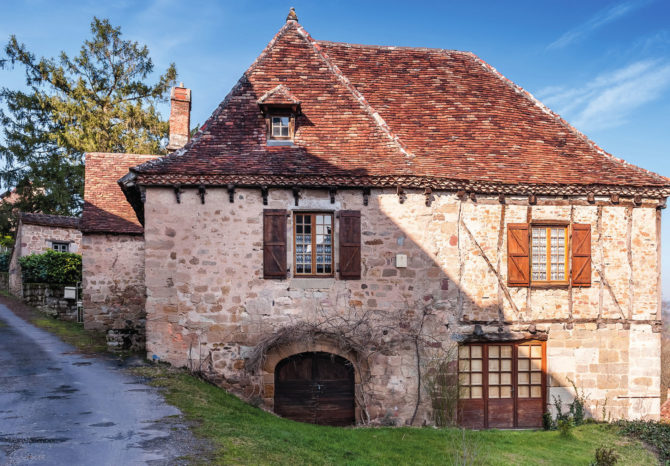
Lead photo credit : The perched village of Curemonte in Corrèze is one of the ‘Plus Beaux Villages de France’
Share to: Facebook Twitter LinkedIn Email
Related Articles
By FrenchEntrée
Leave a reply
Your email address will not be published. Required fields are marked *
REPLY